 Whether through a purchase or demo gear, you have your hands on an Aerohive AP. If you have never dealt with Aerohive before from a wireless perspective, you might be asking yourself how to configure the AP. This post is meant to serve as a starting point to take that AP and put some configuration on it so that you can start connecting clients.
This post is not meant to be an exhaustive reference, as there are MANY things that can be configured. Rather, it is meant to be a starting point in which the reader is introduced to the overall configuration mechanisms within HiveManager at a high level. At the time of publishing(December 2018), these are the steps needed to put in AP into operation. However, the nature of the rapid pace at which HiveManager is updated means that things could change that alter the configuration flow. It is also worth noting that this post utilizes the public cloud/Internet option for HiveManager. Although there are 3 different deployment options for HiveManager(public cloud, private cloud, single VM), this post utilizes the public cloud option. Configuration between the 3 different models is relatively the same.
Before You Plug That AP In
If you have experience with wireless vendors that use local forwarding from each AP, then you are already accustomed to having APs connected to switch ports configured as 802.1q links/trunks. If your only experience has been with controllers that were only configured with centralized forwarding, an Aerohive deployment is going to look a lot different as you will move from using access or single VLAN switch ports to using 802.1q trunk ports. Should you have some sort of requirement to tunnel traffic back to a central location for things like guest access, fear not. The Aerohive solution allows you to pick and choose which users need to be tunneled over the network to a particular location. Notice that it is particular users and not an entire SSID. The flexibility of the Aerohive solution allows to you be very granular with which traffic is tunneled and which traffic is switched locally.
You probably already have VLANs set aside for your various types of traffic. If you don’t already have one, you will want to create another VLAN for management purposes. Each Aerohive AP will have its own management IP, which will be used to talk to HiveManager, as well as any other Aerohive APs on the network. The management IP will also be used to make connections to RADIUS servers and any additional management systems for things like SNMP and syslog.
Plugging The AP In
Once you plug an Aerohive AP into your network, the AP is going to “phone home”. It can utilize a number of mechanisms to find where it needs to go in the same way that a controller based AP will. The typical method is going to be DNS. By default, the AP will come online, grab a DHCP lease, and try to connect to redirector.aerohive.com. In order to do that, it is going to have to have access to DNS servers, which will almost always be provided via the DHCP lease. However, in addition to DNS, the AP will attempt to set its internal clock with NTP. In order to make a secure connection to the redirector site or ultimately HiveManager, the AP will need to have its system clock set to a fairly current time so that the certificate on the Internet side of the connection is viewed as valid. There are certain defaults the AP can and will use for DNS and NTP, but if the outbound firewall blocks the ports for DNS and NTP, there is a chance the AP will fail to connect. There are ways to manually intervene via a console or SSH connection to the AP, but one of the benefits of cloud networking is making connections work right out of the box without having to perform staging operations on hardware. You should be able to just ship it to the desired location and plug it in.
Assuming the AP is plugged in, gets a DHCP lease, sets its timing, and can perform DNS resolution, it will connect to redirector.aerohive.com. It will sit there until you add the AP to HiveManager using its serial number. We’ll cover that aspect shortly. Once the serial number has been added to your virtual hive, the redirector system will then tell the AP where it should move to for management purposes. This all happens in the background once you add a device serial number to HiveManager.
You can plug in the AP right away, or plug it in after you have built out the initial configuration. You’ll know you have a secure connection to redirector or HiveManager if you see a white light displayed on the AP. Some models, like the wall plate AP(model 150W) will use a green light instead of a white light. Generally speaking, if you see anything other than a red/amber light, consider the device properly connected.
Initial HiveManager Setup
HiveManager is meant to be a self-service operation. As long as you have a license key(in lieu of this, you can trial HiveManager for 30 days with full feature functionality), you can provision your own environment without having to wait on Aerohive to build out your environment for you. This brings up another point. There are two flavors of HiveManager. The most common is referred to as HiveManager Select. This option requires an entitlement key for each of your devices(e.g. AP, switch, router). The second option is referred to as HiveManager Connect. With Connect, the management piece is free. All you have to buy is the hardware. The difference between Connect and Select is that with Connect, you have far fewer configuration and management options. You also will have to use the forums on the Aerohive HiveCommunity site for support. There are options to have phone support with HiveManager Connect if desired. With HiveManager Select, you have ALL options available in HiveManager as well as 24×7 web and phone support.
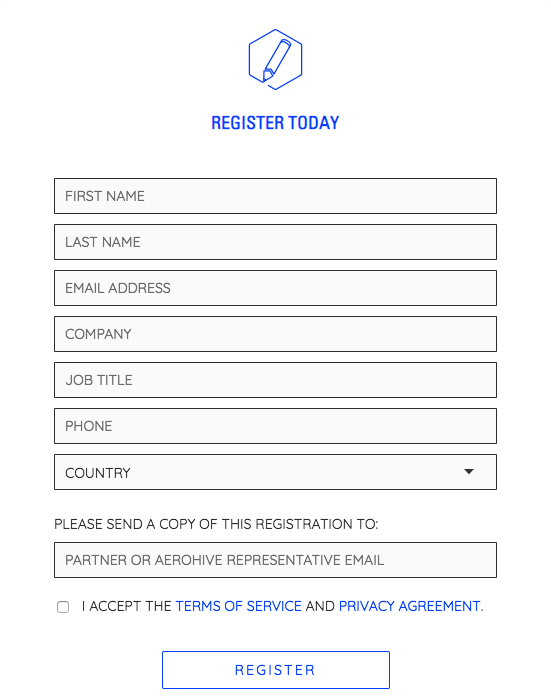
The first thing you want to do is open a web browser connection to https://cloud.aerohive.com. This is the site you will access HiveManager from for all future connections after registration, so you will want to bookmark or memorize the URL. Since you probably don’t have a login, you will want to click on the “REGISTER” link on the page. Fill in the appropriate information on the registration page. The only field you don’t have to fill out is the one that relates to sending a copy of the registration to a partner or Aerohive representative.
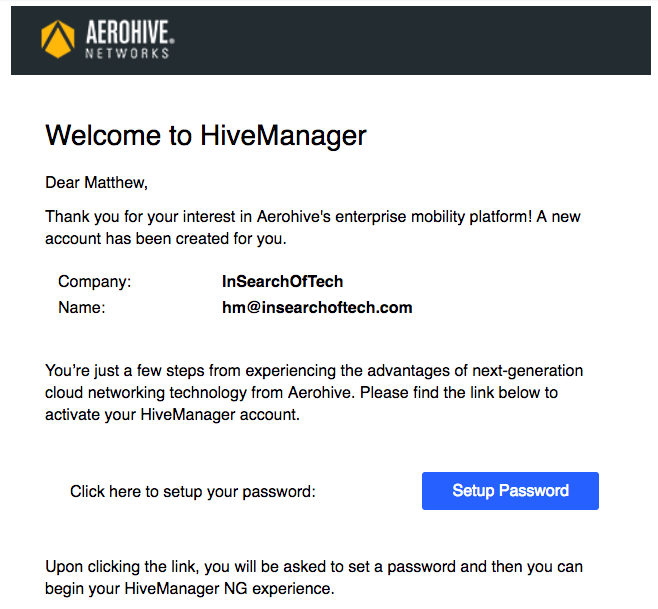
Once you click on “REGISTER”, you will receive an e-mail within a few minutes. Within that e-mail, there will be a link to set a password for the account you created.
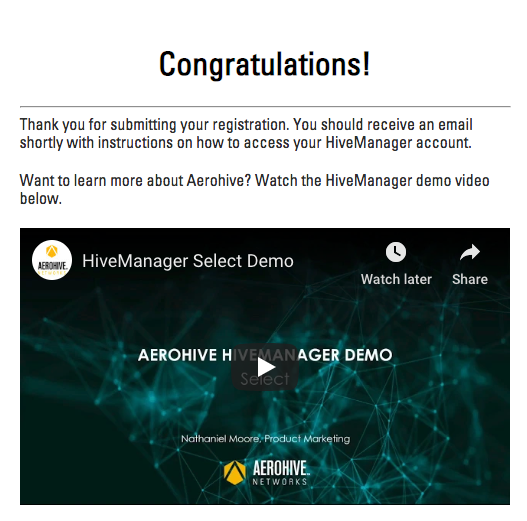
If there are going to be multiple administrators within your HiveManager environment, only one person needs to fill out the initial registration information. You can add additional accounts once your virtual hive(VHM) is created through a much easier process. It is worth noting that once you click on “REGISTER”, another screen will appear with the following verbiage as well as an embedded HiveManager onboarding video:
This video will give you a general overview of the onboarding process as well as a basic overview of HiveManager. It is worthwhile to watch it if you are new to Aerohive, and in case you miss the link or just want to watch the video without going through the registration process, it is linked below:
Your password has been set, and now you see the following screen:
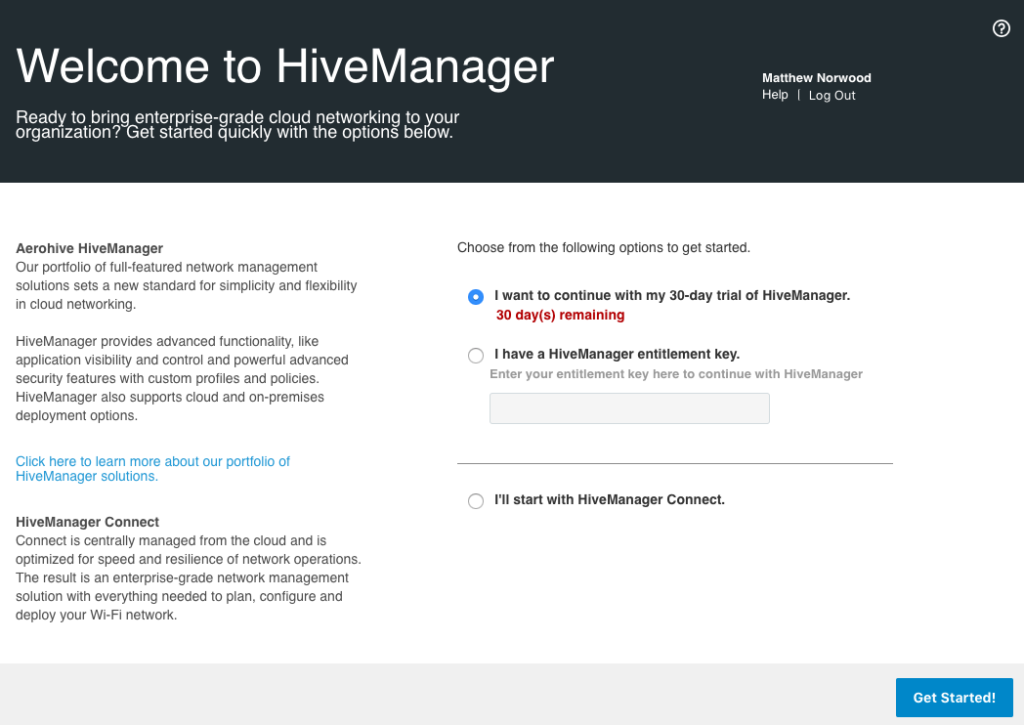 I am going to use the default 30 day trial option, but if you have an entitlement key, you can enter it here as well. Once I click on the “Get Started!” button in the bottom right, the following screen appears:
Click on the “Onboard Devices” button to get rid of this screen. You won’t see this screen again, and it is better if we learn how to configure things in the way in which we will normally do so within HiveManager. You should be looking at the “MONITOR” tab within HiveManager now. We’ll come back to this page in a bit. First though, we want to build an initial network policy, so click on the “CONFIGURE” tab at the top of the screen.
You should now see the following:
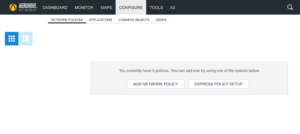
Note: The network policy is the container in which almost all configuration of a device is stored. Apart from device specific things like the hostname, almost everything you will do configuration-wise for all of your devices will live within the network policy. I’ll cover things like the network policy, user profile, and radio profiles in another post as each of those items require a much more detailed breakdown.
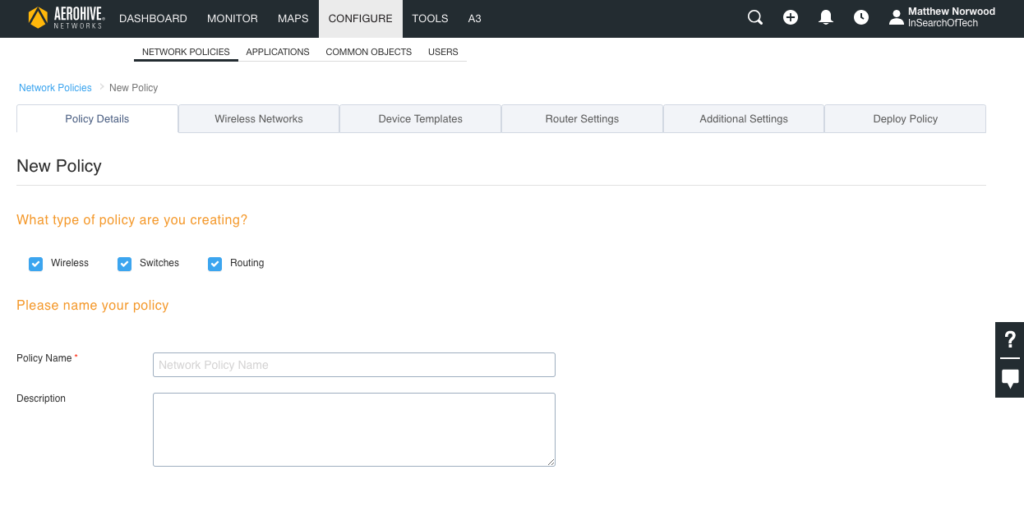
Click on “ADD NETWORK POLICY” and you will see the following screen:
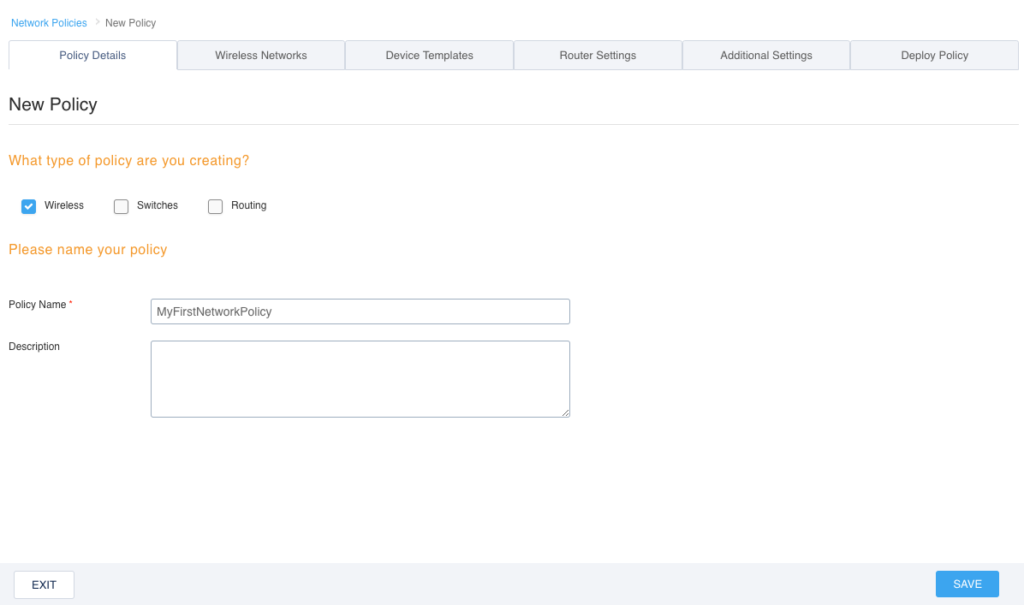
In order to avoid configuration sprawl, we could configure wireless and wired devices under a single network policy. However, since all we are worried about for this particular post is wireless, uncheck the boxes that say “Switches” and Routing”. Give your network policy a name and then click “SAVE” at the bottom right of the screen.
You should see the following screen now:
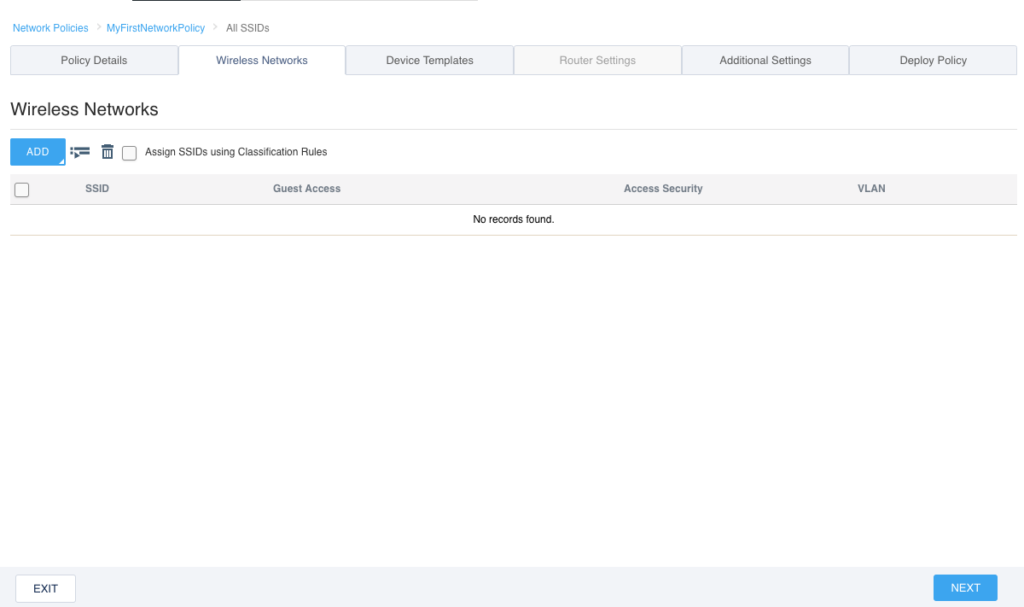
Since we are only building a policy for wireless, you will notice that the “Router Settings” tab at the top is now grayed out. There is no point in going to that tab since we are not dealing with routing in this policy. What we are looking at now is the “Wireless Networks” tab. On this tab, we can create an SSID, or select an existing SSID if we had created one in another policy and wanted to re-use it. Since this is our first policy, click on the “ADD” button. You’ll notice that when you click on the button, two choices appear:
If we were creating a guest network, we could click on “Guest Access Network” and it would give us a streamlined way to configure guest type SSIDs. For this particular post though, we just want to create a simple WPA2 Personal SSID which uses a standard passphrase. Click on “All other Networks (standard)”.
You should now see the following screen:
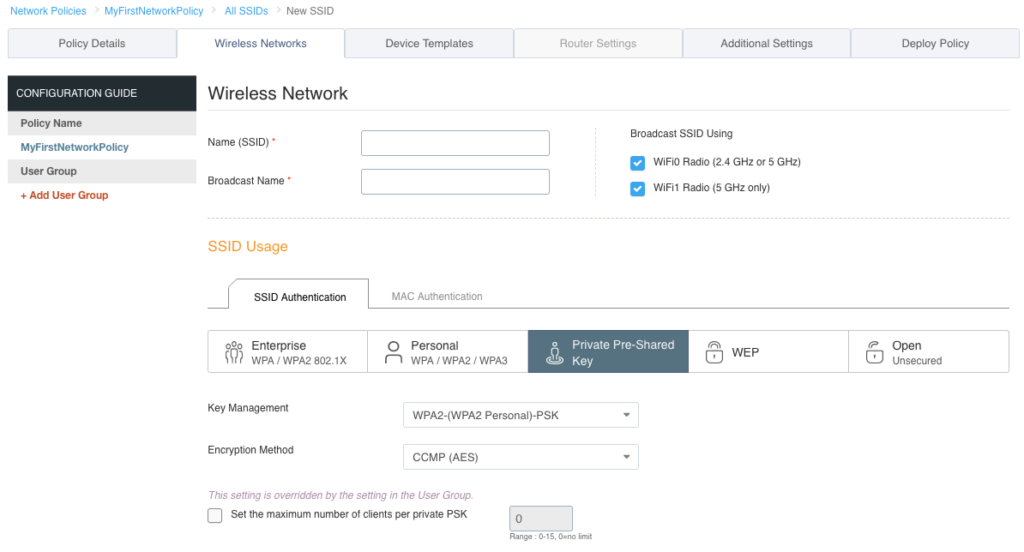
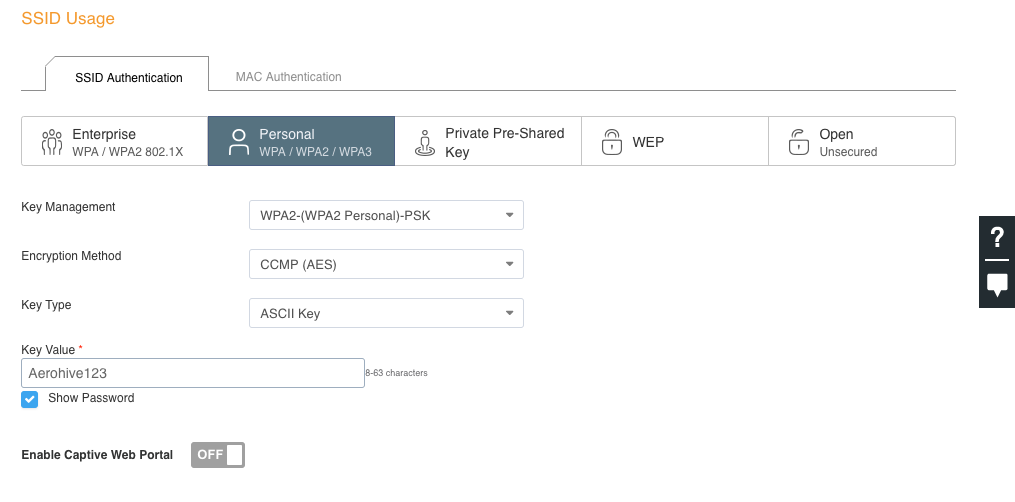
Type in a name for your SSID. Notice there are two fields at the top. The “Name (SSID)” field is simply the name of the SSID object as it will appear in HiveManager. If you hit the tab key or simply click on the “Broadcast Name” field below, it will duplicate whatever you typed in on the “Name (SSID)” field. The “Broadcast Name” is what will actually be advertised over the air via a beacon. Under the SSID Usage section, you will see the various authentication types that can be used within this particular SSID. We want to create a basic WPA2 Personal SSID, so click on the “Personal” button. Private Pre-Shared Key(PPSK) is something similar to the standard WPA2 Personal authentication, but it uses multiple passphrases. See here for more info on PPSK.
Enter a passphrase in the “Key Value” field. If you want to make sure of what it will be set to, click on the “Show Password” box to display what you actually typed in the “Key Value” field.
Note: If at any time you are unsure of what you are looking at on the screen, there is always a question mark icon on the far right of the screen. If you click on that question mark, it will open up another tab and display the help documentation about that particular section or feature.
Click on “SAVE” at the bottom right. It should return you to the main “Wireless Networks” screen like the following:

Click on “NEXT” in the bottom right of the screen. Now, you will be looking at the “Device Templates” tab. Since we turned off switching and routing for this particular network policy, the only thing you see in the “Device Templates” tab is a section labeled “AP Templates”. If switching was turned on, it would display another section labeled “Switch Templates”.
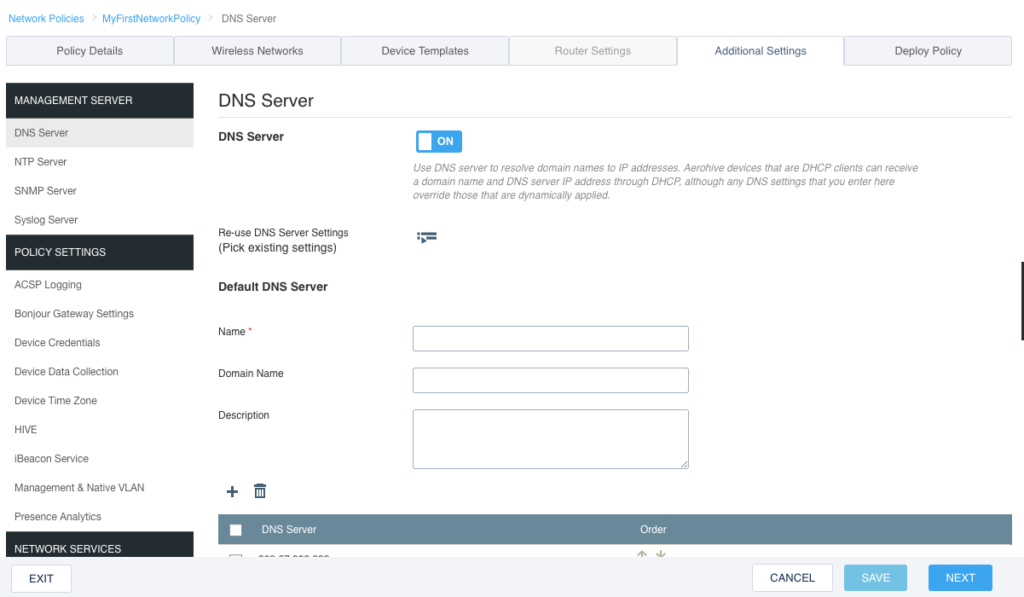
We’re going to skip the “Device Templates” section in the interest of just getting an AP up and running. I’ll cover this tab in another post. Click “NEXT” at the bottom right and it should bring you to the “Additional Settings” tab as shown below:
We are going to skip this tab as well. It contains a bunch of different things that will be covered in another post. Click “NEXT” and it should bring you to the “Deploy Policy” tab which looks like this:
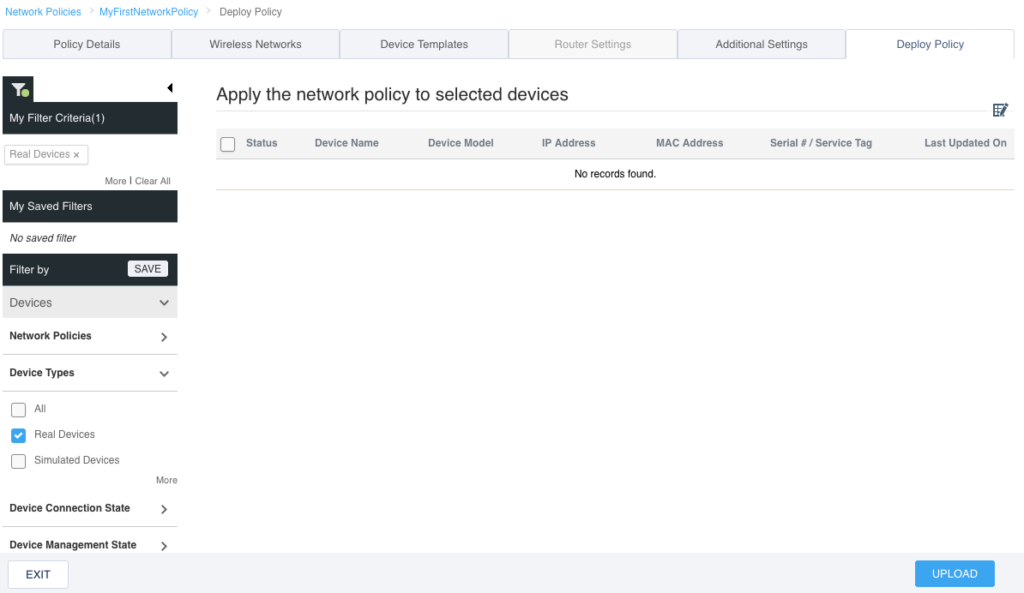
If we had any APs already added to HiveManager, this screen would show the APs in a list and then you could select the AP(s) you wanted to apply this policy to. However, we have not added an AP yet, so we are finished with the network policy configuration. Click “EXIT” on the bottom left of the screen.
Now you are taken back to the “Network Policies” screen. You should see the network policy we just created and it will look like this:
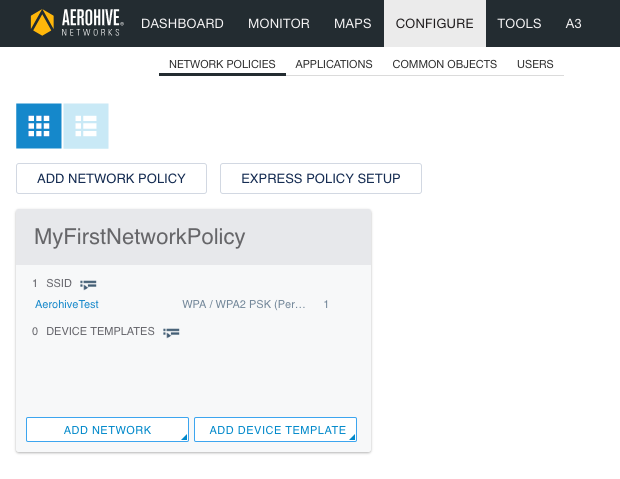
The basic network policy configuration is complete. The next step is to get the AP added to HiveManager and push the configuration to it.
Adding An AP To HiveManager
If you have not plugged in your Aerohive AP, go ahead and do that now. Eventually you should see a solid white light on the AP, or if it is one of the models like the AP 150W, it will be a green light.
Click on the “MONITOR” tab in HiveManager. Next, click on “ADD” and select “Advanced Onboarding”. You will see the following:
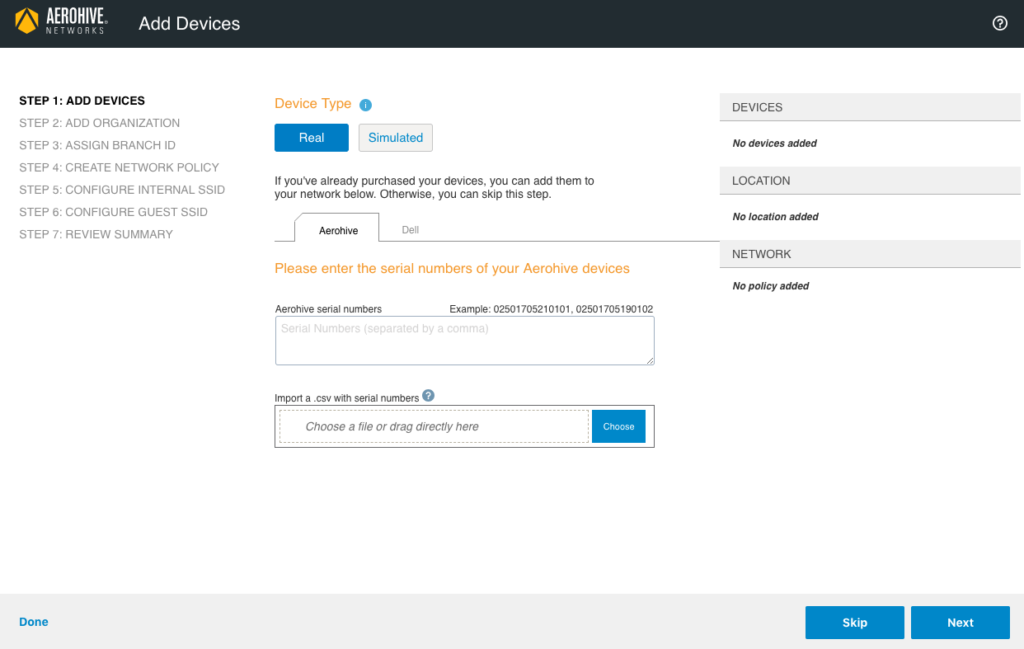
On this screen, add the serial number of the AP in the appropriate box. If you have multiple APs, you can add multiple serial numbers separated with a comma. Alternatively, you could use a CSV file to bring in a large number of APs at once. With the serial number(s) in place on the screen, click on “Next” at the bottom right. The following screen will appear next:
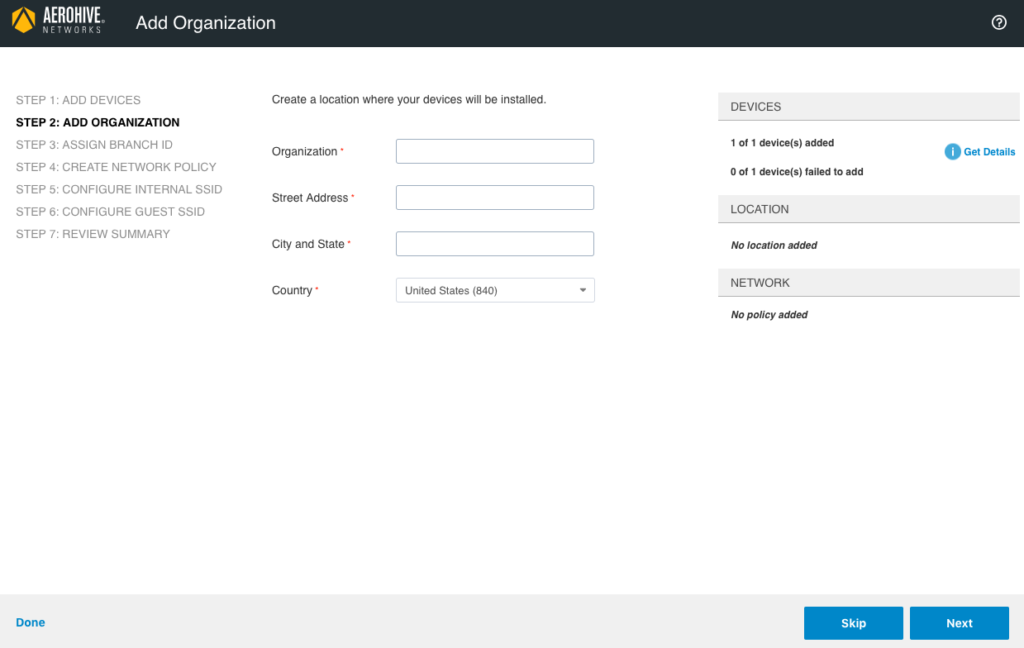
On this screen, you will be creating an “Organization” which directly correlates to the “MAPS” tab, which is where you can setup all of your different locations, buildings, and floors within a given building. When you fill in each of these lines, it uses the “City and State” to create a location, the “Street Address” to create a building, and then creates a default “Floor 1”. You can then assign each AP to a particular floor within a building, but you will have to add a floor plan first, which cannot be done from within this onboarding wizard. You can also go over to the “MAPS” tab and change the name of the location, building, etc. For now though, fill in each section and click on “Next” at the bottom right. The following screen will be displayed:
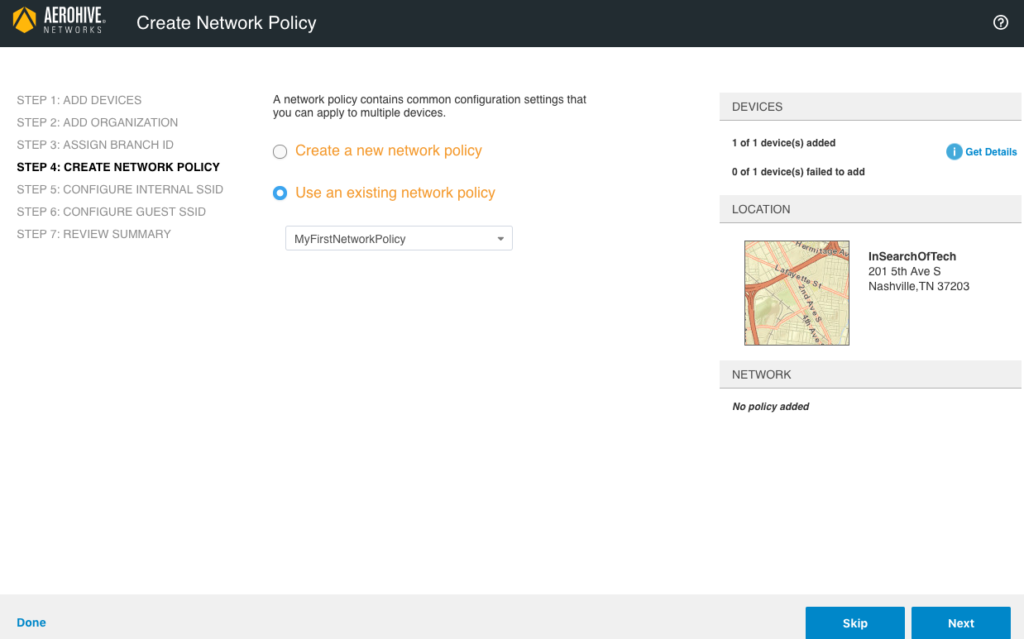
By default, the “Create Network Policy” screen will try and get you to make a new network policy for the device(s) you are onboarding. However, we previously created a network policy, so change the selection to “Use an existing network policy” and it should default to the name of the network policy you built previously. With that existing network policy selected, click on “Next” at the bottom right. The following screen will be displayed:
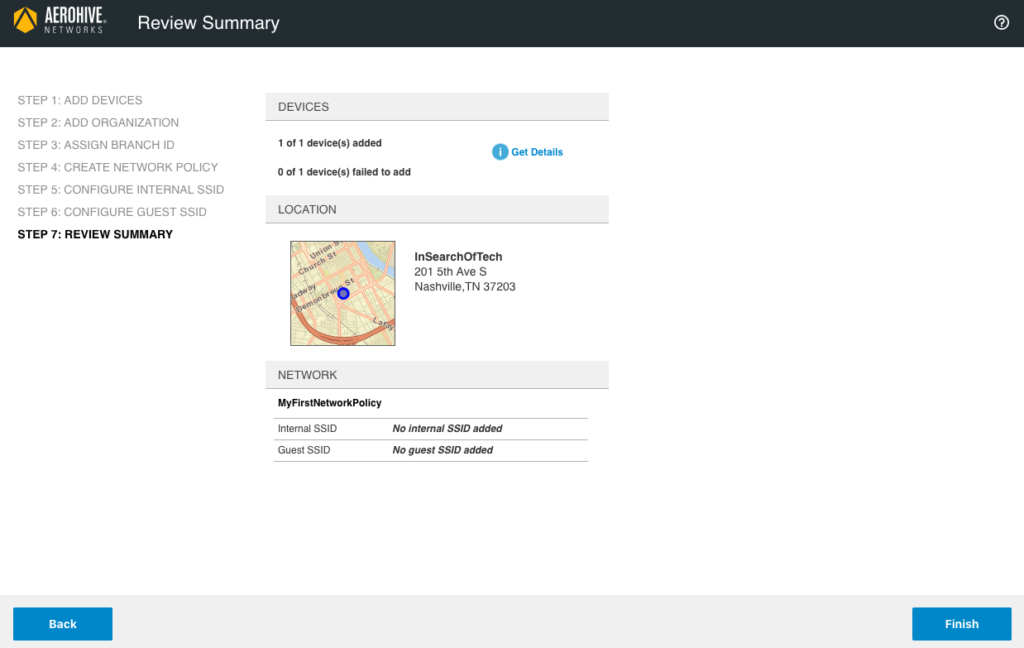
At this point, you should see the “Review Summary” screen. Click on “Finish” at the bottom right.
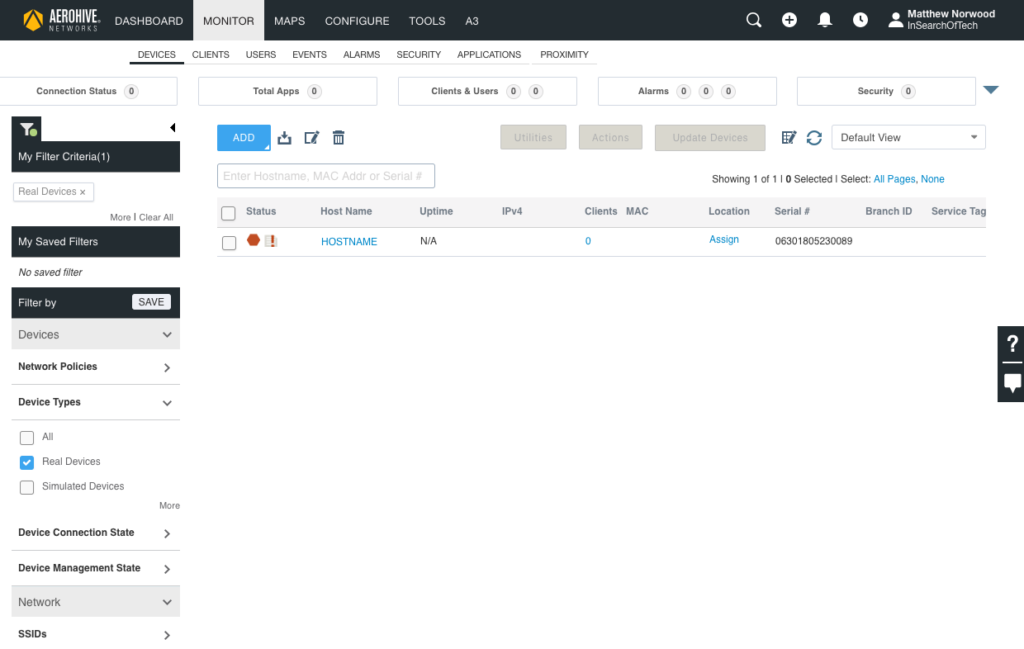
You will now be placed back in the main HiveManager interface in the “MONITOR” tab section. If your AP was recently powered on, it may look like the image below:
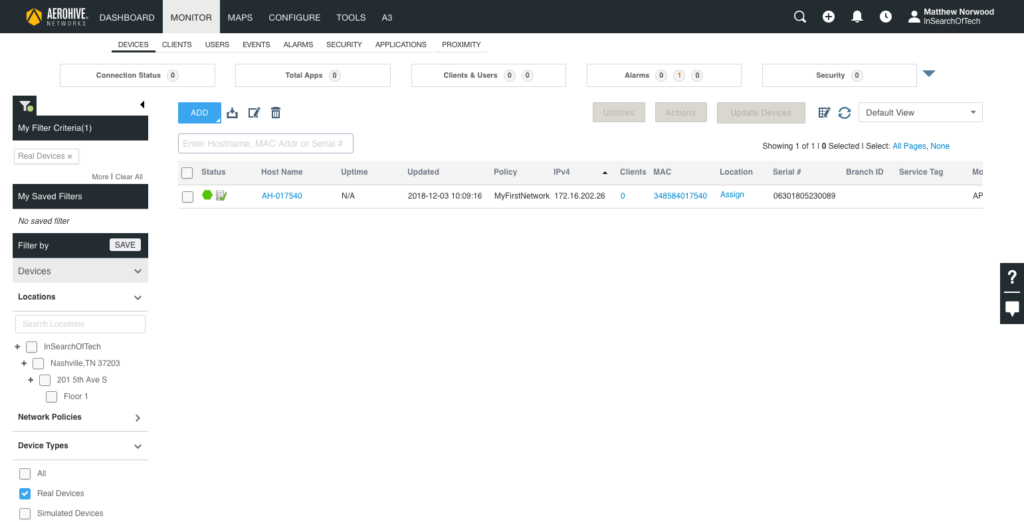
Once the AP makes a secure connection to HiveManager, the red hexagon on the far left under the “Status” column will turn green. The AP will push down the configuration from the network policy when it connects to HiveManager for the first time. Additionally, depending on the code level on the AP, it may update to a newer version. Expect it to take a few minutes for the AP to come up, update itself with configuration, and reboot before achieving a normal steady state. You may see the connection status go green, turn red again, and then go back to green.
When the AP has been updated with the network policy and is at a normal state to connect clients, it will look like the following:
Updating The Configuration
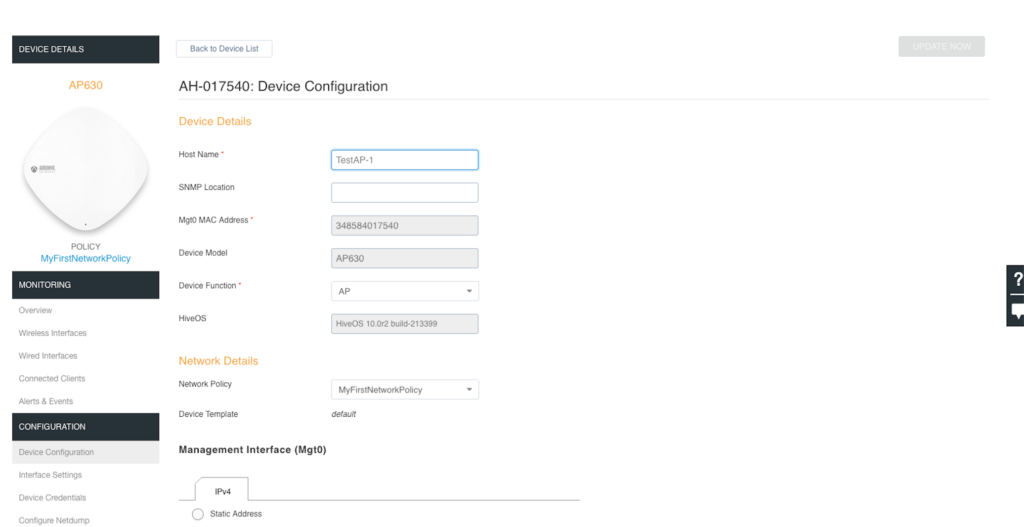
Your AP is now up and running in HiveManager, but the configuration was uploaded during the onboarding process. What I would like to do is show you what it looks like when you make a change to the network policy or device and need to push an updated configuration to it. Let’s change something simple like the hostname of the device.
Click on the hostname of the AP. By default, it will choose a hostname of “AH-” and the last 6 characters of its default MAC address.
Under the “CONFIGURATION” menu on the left side of the screen, click on “Device Configuration”. Modify the “Host Name” field to whatever you want to name the AP. Once that is done, scroll down and click on “SAVE” in the bottom right of the screen.
If you scroll back up to the top after clicking on “SAVE”, you will see a box that says “UPDATE NOW”. You could click on that and the changes will get pushed to the AP, but we are not going to do that in order to see what it will look like from the main MONITOR tab page. Click on “Back to Device List” at the top left instead.
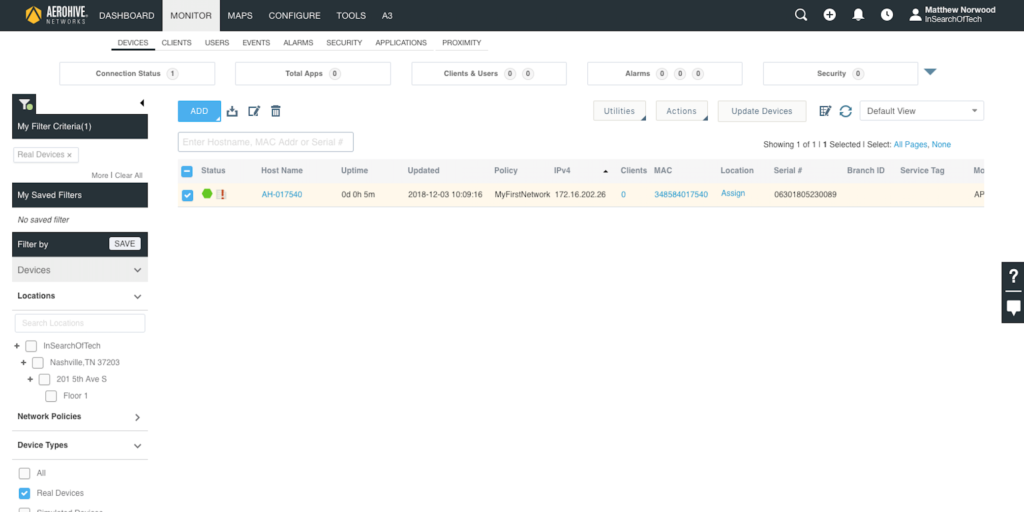
Now you should see the main MONITOR tab screen with your AP, but notice there is a red exclamation point next to the green hexagon on the far left. That red exclamation point tells you that there is a difference in the configuration on HiveManager and the AP itself. We need to push this change to the AP before it will take effect.
You can click on the red exclamation point and see what those pending changes are. Go ahead and click on the exclamation point.
Another window opens up with 3 tabs. Since there is a pending change, it defaults you to the “Audit” tab.
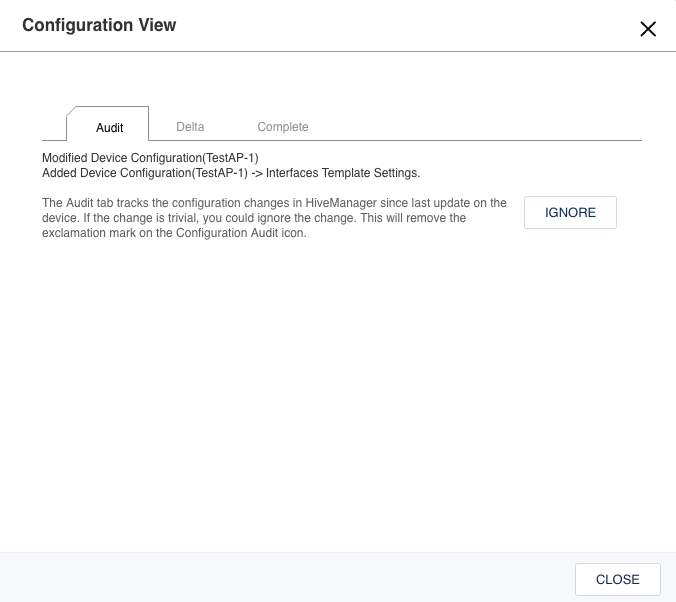
The Audit tab shows you the general sections in which the configuration changed. This lets you know what changes were made from a high level. Click on the “Delta” tab.
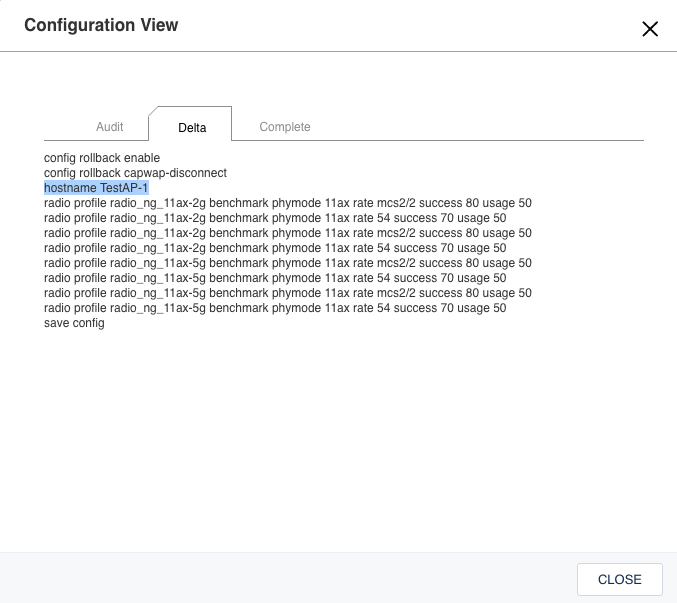
When the Delta tab is displayed, you can see the exact CLI string that will be pushed to the AP. Note the “hostname” command I highlighted. If you were to click on the “Complete” tab, you would see the entire configuration that HiveManager shows for that particular AP. Click on the “X” at the top right of this window to close it. You could click on “CLOSE” at the bottom right as well if you wanted to.
Now that we know what changes are going to be pushed down to the AP, we want to initiate the push. Select the box to the far left of the line the AP is displayed on.
Next, click on the “Update Devices” button at the top right of the screen.
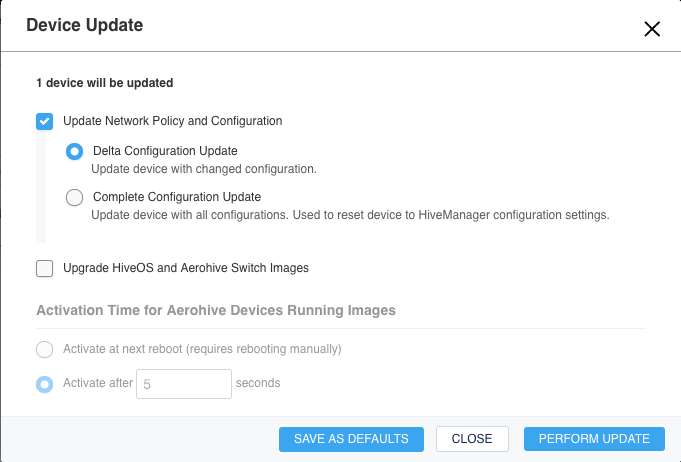
This new window that opens up gives you some options regarding pushing the configuration, updating the firmware on the device(Aerohive APs run HiveOS), or even scheduling when that updated configuration or firmware gets applied to the AP.
Note: There are two methods to push configuration to a device. Delta will only push the incremental changes and will not affect the AP to a great extent in terms of client connections unless you are changing something that is RF related. Complete will push the entire configuration to the AP, but in doing so, it will reboot the AP. You can use Delta pushes for the overwhelming majority of configuration changes to an AP. The system is smart enough to tell you if a complete push is required and will go so far as to make it to where you cannot select the delta option.
Since all we want to do is update the hostname, ensure that the “Delta Configuration Update” option is selected and then click on “PERFORM UPDATE” in the bottom right of the window.
After clicking on “PERFORM UPDATE”, HiveManager will start to push the delta update to the AP. It should take a few seconds to push it out. Once it is done, the red exclamation point will be replaced with a green check mark. When you see that green check mark, you know the configuration on HiveManager is in sync with the configuration on the AP.
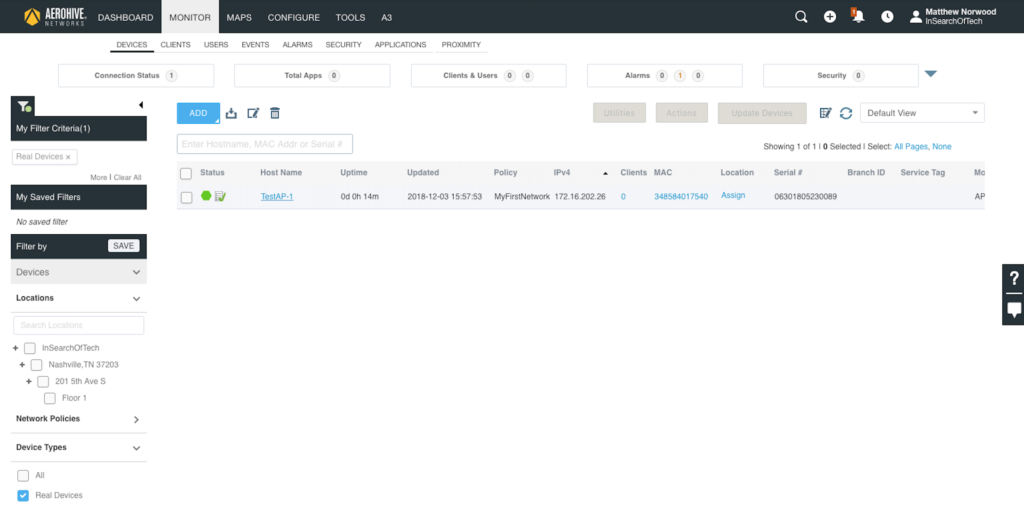 You should be able to make a client connection to this particular AP using the passphrase you set when configuring the SSID.
That’s all there is to it! Well, that’s not ALL there is to it. There are a lot of other things you can configure in HiveManager, but those will be covered in follow-up posts. The goal here was to get some configuration loaded onto the AP so that you can connect some clients to it.


